 Deploying Your First Machine Learning API
 Deploying Your First Machine Learning API
Effortless way to develop and deploy your machine learning API using FastAPI and Deta.

Image by Author | Elements by vectorjuice
Introduction
In this project, we will learn how we can build an application programming interface (API) for your machine learning model and then deploy it with simple code. It took me one hour to learn FastAPI and five minutes to learn how to deploy it to Deta servers. We will also test our API on both local server and remote server using Python Request. Let’s go a little bit deeper into the technologies that we are going to use in our project.

Image by Author
spaCy
spaCy is more friendly towards application and deployment as compared to the famous NLTK Python library which is used for experimentation and evaluation. spaCy comes with prebuild statistical neural network NLP models with powerful features that are easy to use and implement in your project spaCy. We will be using quite a simple and small prebuilt English model to extract entities from our text.
FastAPI
FastAPI is a fast web framework for building APIs with python, it comes with faster query time, easy and minimize code for you to design your first API within few minutes FastAPI. In our project we will be learning how FastAPI works and how can we use our prebuilt model to get entities from the English text.
Deta
We will be using Deta Micros service for our API and Deploy our project without docker or YAML files. Deta platform comes with easy to deploy CLI, high scalability, secure API authentication keys, option to change subdomain, and logging of the web traffic. These functions are completely free to use on Deta. In our project, we are going to use Deta CLI to deploy our Fast API with few lines of scripts.
Code
While I was learning FastAPI, I stumble upon the YouTube video that motivated me to write this article. Sebastián Ramírez explained how the Fast API works and how it’s the fastest python web framework available. We will be writing two Python files. One contains a machine learning model, and another file contains your API code.
Requirements
Before we start, we need to create a new directory with a requirements.txt file. You can find all the necessary libraries that we are going to use below ????
fastapi
spacy
uvicorn
https://github.com/explosion/spacy-models/releases/download/en_core_web_sm-3.1.0/en_core_web_sm-3.1.0.tar.gz
Either you can install them one by one or use ????
$ pip install -r requirements.txt
We will be using a pretrained NLP model for this project, so we need to download it from the GitHub repository https://github.com/explosion/spacy-models or just run the requirement file and it will download and install it automatically.
Machine Learning Model
We will be using pretrained Spacy NLP model to extract the entities from the text. If you are using Jupyter notebook, try using %%writefile to create python file in your directory.
First, we loaded NLP model then extracted entities from CBS News article. With only few lines of code you are able to run your first machine learning model. You can also load trained model using same method.
API file
This is your main file which contains:
- read_main: use GET, which requests data from the resource in our case it will display a message saying Welcome.
- class Article: Use pydantic BaseModel to define objects and variables that will be used for your API (helpmanual.io). In our case, we are defining content as string and comments as lists of strings.
- analyze_article: It takes a List of text with comments and displays entities using NLP objects from ml file.
I know it’s quite confusing, so let’s break it down into smaller parts to understand it well.
Breaking Down
We have created an object of FastAPI then use it as decorator on your function using @app. get(“/”).
- @app is your decorator of FastAPI object
- .get or .post if HTTP methods for returning data or processing inputs
- (“/”) is the location on web server. In our case its main page. If you want to add another directory, you can use (“/<new_section>/”)
we have created read_main function to display message on main page, it’s that simple.
Now we will create an Article class that inherits functions and variables from BaseModel. This function helps us create the type of argument that we are going to use as in the POST method. In our case, we have created content as a string variable and comments as Lists of strings.
In the last part, we are creating a POST method (“/article/”) for our API. This means we will be creating a new section that will take arguments as input and return the results after processing them.
- Article class as Argument: Creating articles argument using List of Article, which will allow us to add multiple entries of texts.
- Extracting data from articles: Creating loops to extract data from a list of articles and then from lists of comments. It also adds comments to an array.
- Loading text into NLP model: loading content into nlp pretrained model.
- Extracting entities: extracting entities from the nlp object and then adding it to ents array. This will stack the results.
- Display: The function will return a list of entities and comments.
Testing
Fast API was built on Uvicorn so the server also runs on Uvicorn. In Jupyter notebook, you can run the app using ???? or in the terminal just type uvicorn then the main file and with FastAPI object which is app in our case.
Our server is running smooth so let’s use request.get method to access it. The API is working by showing us “Welcome” message on main page.
now let's try adding single text and comments as dictionary in a list. We will be using POST request method and /article/ to access our NLP model function. Convert your output into .json() to make it easy to extract the data.
we have our dictionary keys: [‘ents’, ‘comments’]
Let's check how our entire output looks like. It looks like we have ents with list of labels and entities. Same goes for comments key
Now let's extract single entity with its text to check the flexibility of our output. In our case we are extracting second entity from output.
The result shows perfection.
Deployment
Go to your terminal or you can do same steps with in your Jupyter notebook cell but adding “!” before any script. First your need to access your directory using cd where your main.py and ml.py files are located.
cd ~”/FastAPI-ML-Project”
The three main file that are required by Deta are ml.py, main.py, and requirments.txt.
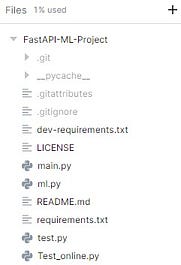
Image by Author | Project Directory
If you are using Windows use bellow command in PowerShell to download and install Deta CLI
iwr https://get.deta.dev/cli.ps1 -useb | iex
for Linux
curl -fsSL https://get.deta.dev/cli.sh | sh
Then use deta login, it will take you to the browser and ask you to enter username and password. If you are already logged in, it will take few seconds to authenticate.
deta login
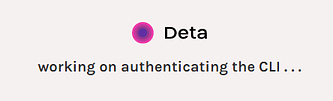
Deta Authentication | deta
These two words in your terminal are magic words, which will upload the files and deploy your app with in 2 minutes.
deta new
Your app is uploaded on an end point link. In our case https://93t2gn.deta.dev/
Successfully created a new micro{“name”: “FastAPI-ML-Project”,“runtime”: “python3.7”,“endpoint”: “https://93t2gn.deta.dev/",“visor”: “enabled”,“http_auth”: “disable”}Adding dependencies…Collecting fastapi…Successfully installed ……
If you see error check logs using deta logs, make some changes and then use deta deploy to update the changes.
As you can see our app is deployed and running on Deta servers.
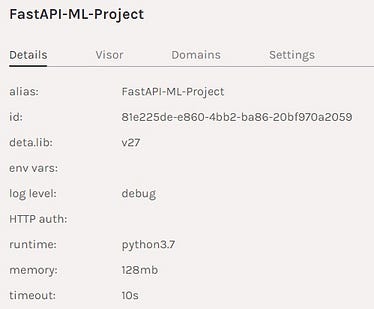
Project summary | deta
You can go to the link provided by Deta and check it yourself.

Image by Author
Testing Web API
Finally let's test our remote API as a microservice on Deta platform. This time instead of adding local IP, we are going to add Deta end point link. We can run without header as we don't have API authentications enable. Deta also provide Free API keys when authentications are enabled. It means only you or the person who have API key can access web server. To learn more on authentication and subdomain I suggest you read documentations.
we are going to add same parameter and same code in order to get same result and voilà it works magic. You API is online and can be easily access by using the link.
Conclusion
After learning FastAPI, I was thinking about what’s next, so one day while scrolling through the web I stumble upon Deta which got my attention. It took me few minutes to install Deta CLI and deploy my API on a remote server. I am quite impressed by their subdomain and Free API key feature. It took me no time to understand how the service works and how I will be using it for my future projects.
We all ask this question after learning few machines learning models.
I know how to train my model and get predictions, but what’s next? How do I share my model with others? So that they can see what I have built and use these features in their projects.
This is where cloud platform like Heroku, Google, Azure comes in, but these platforms are quite complex understand and you need to learn to code for Docker file which can be frustrating sometimes. Deta solves all your problems with its simple two-word script which will deploy and run your app in seconds.
You can also check my GitHub repo on this project: kingabzpro/FastAPI-ML-Project.
You can follow me on LinkedIn and Polywork where I publish article every week.
Bio: Abid Ali Awan is a certified data scientist professional, who loves building machine learning models and blogs about the latest AI technologies.
Original. Reposted with permission.
Related:
- Working with Python APIs For Data Science Project
- Building RESTful APIs using Flask
- Production-Ready Machine Learning NLP API with FastAPI and spaCy