How To Create Natural Language Semantic Search For Arbitrary Objects With Deep Learning
An end-to-end example of how to build a system that can search objects semantically.
By Hamel Husain & Ho-Hsiang Wu, GitHub

A picture of Hubot.
Motivation:
The power of modern search engines is undeniable: you can summon knowledge from the internet at a moment’s notice. Unfortunately, this superpower isn’t omnipresent. There are many situations where search is relegated to strict keyword search, or when the objects aren’t text, search may not be available. Furthermore, strict keyword search doesn’t allow the user to search semantically, which means information is not as discoverable.
Today, we share a reproducible, minimally viable product that illustrates how you can enable semantic search for arbitrary objects! Concretely, we will show you how to create a system that searches python code semantically — but this approach can be generalized to other entities (such as pictures or sound clips).
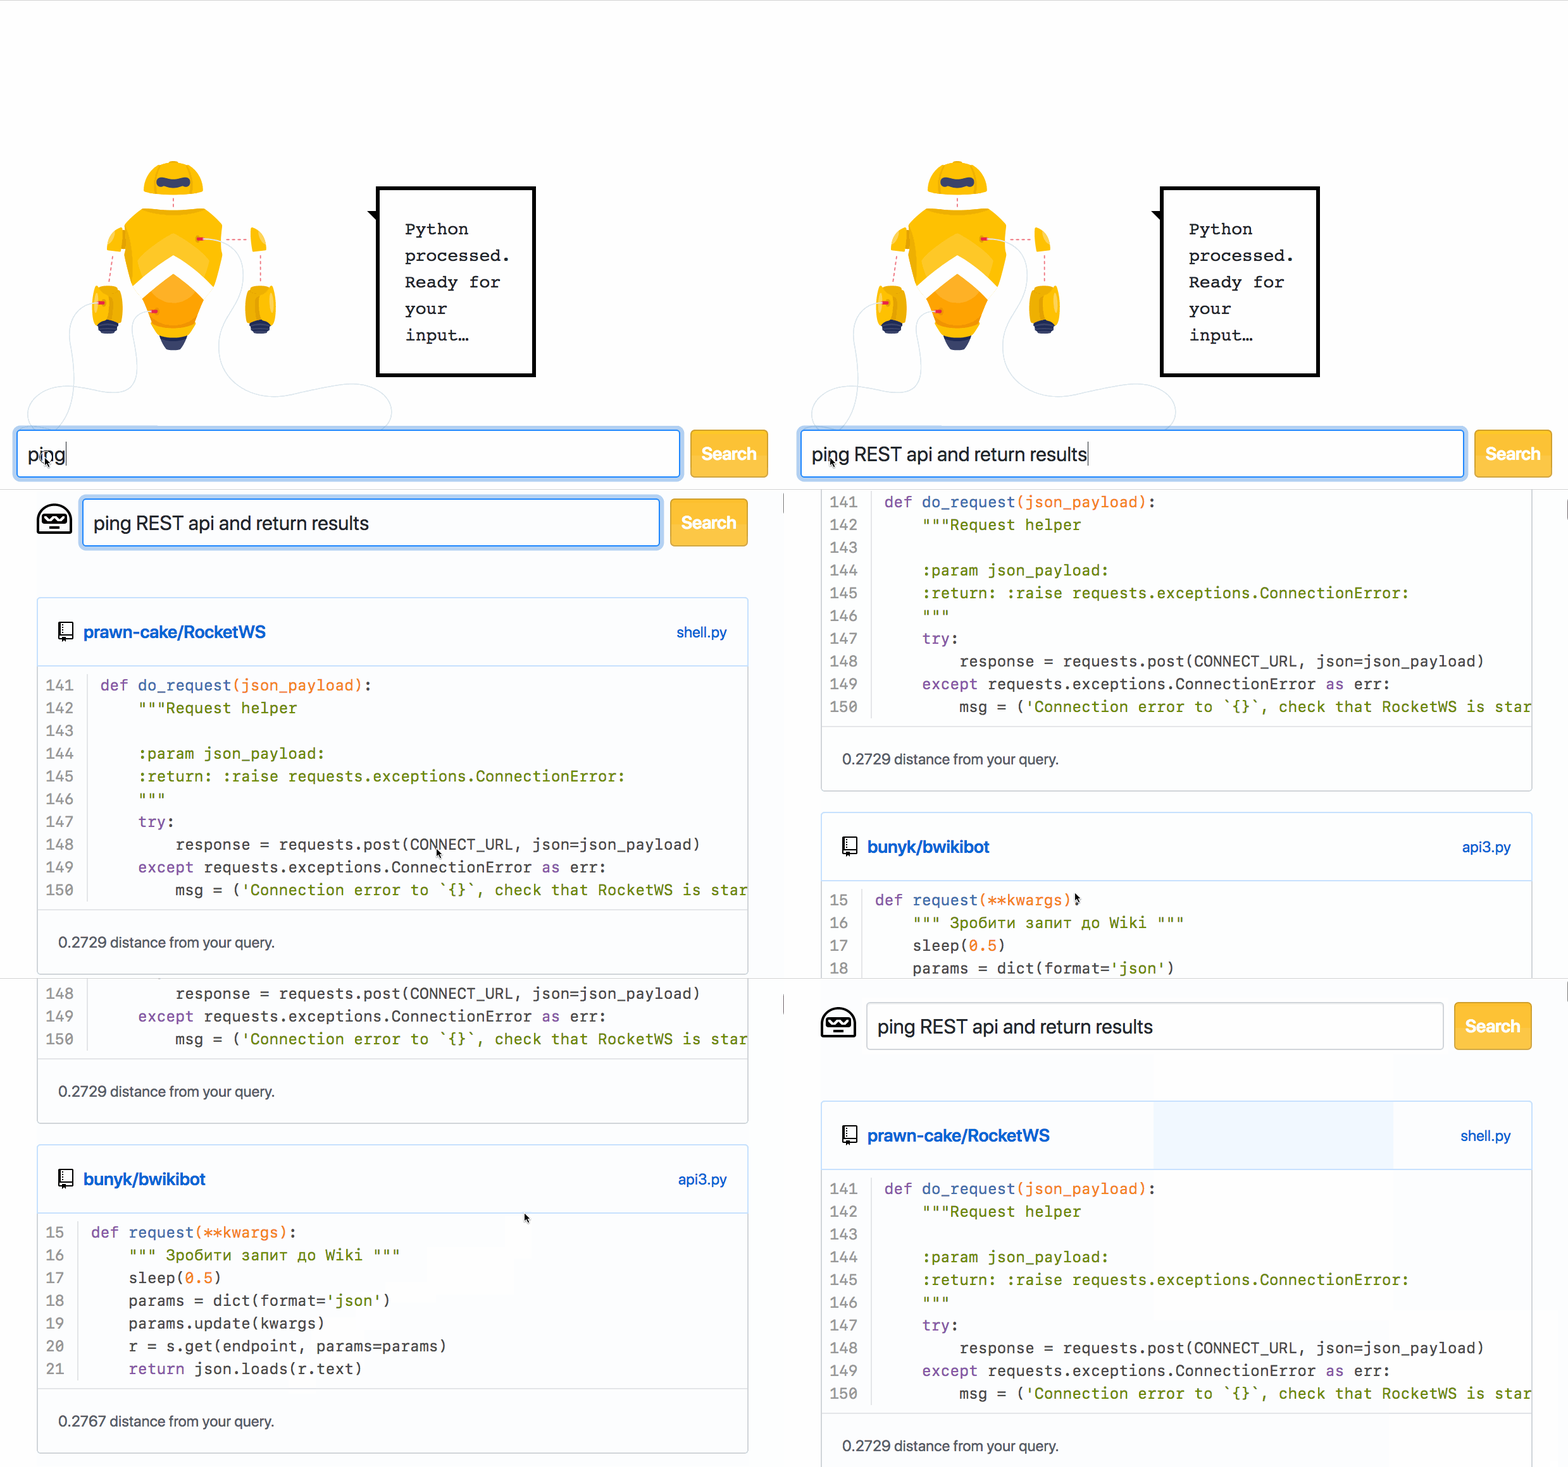
Why is semantic search so exciting? Consider the below example:

Semantic search at work on python code. *See Disclaimer section below.
The search query presented is “Ping REST api and return results”. However, the search returns reasonable results even though the code & comments found do not contain the words Ping, REST or api.
This illustrates the power of semantic search: we can search content for itsmeaning in addition to keywords, and maximize the chances the user will find the information they are looking for. The implications of semantic search are profound — for example, such a procedure would allow developers to search for code in repositories even if they are not familiar with the syntax or fail to anticipate the right keywords. More importantly, you can generalize this approach to objects such as pictures, audio and other things that we haven’t thought of yet.
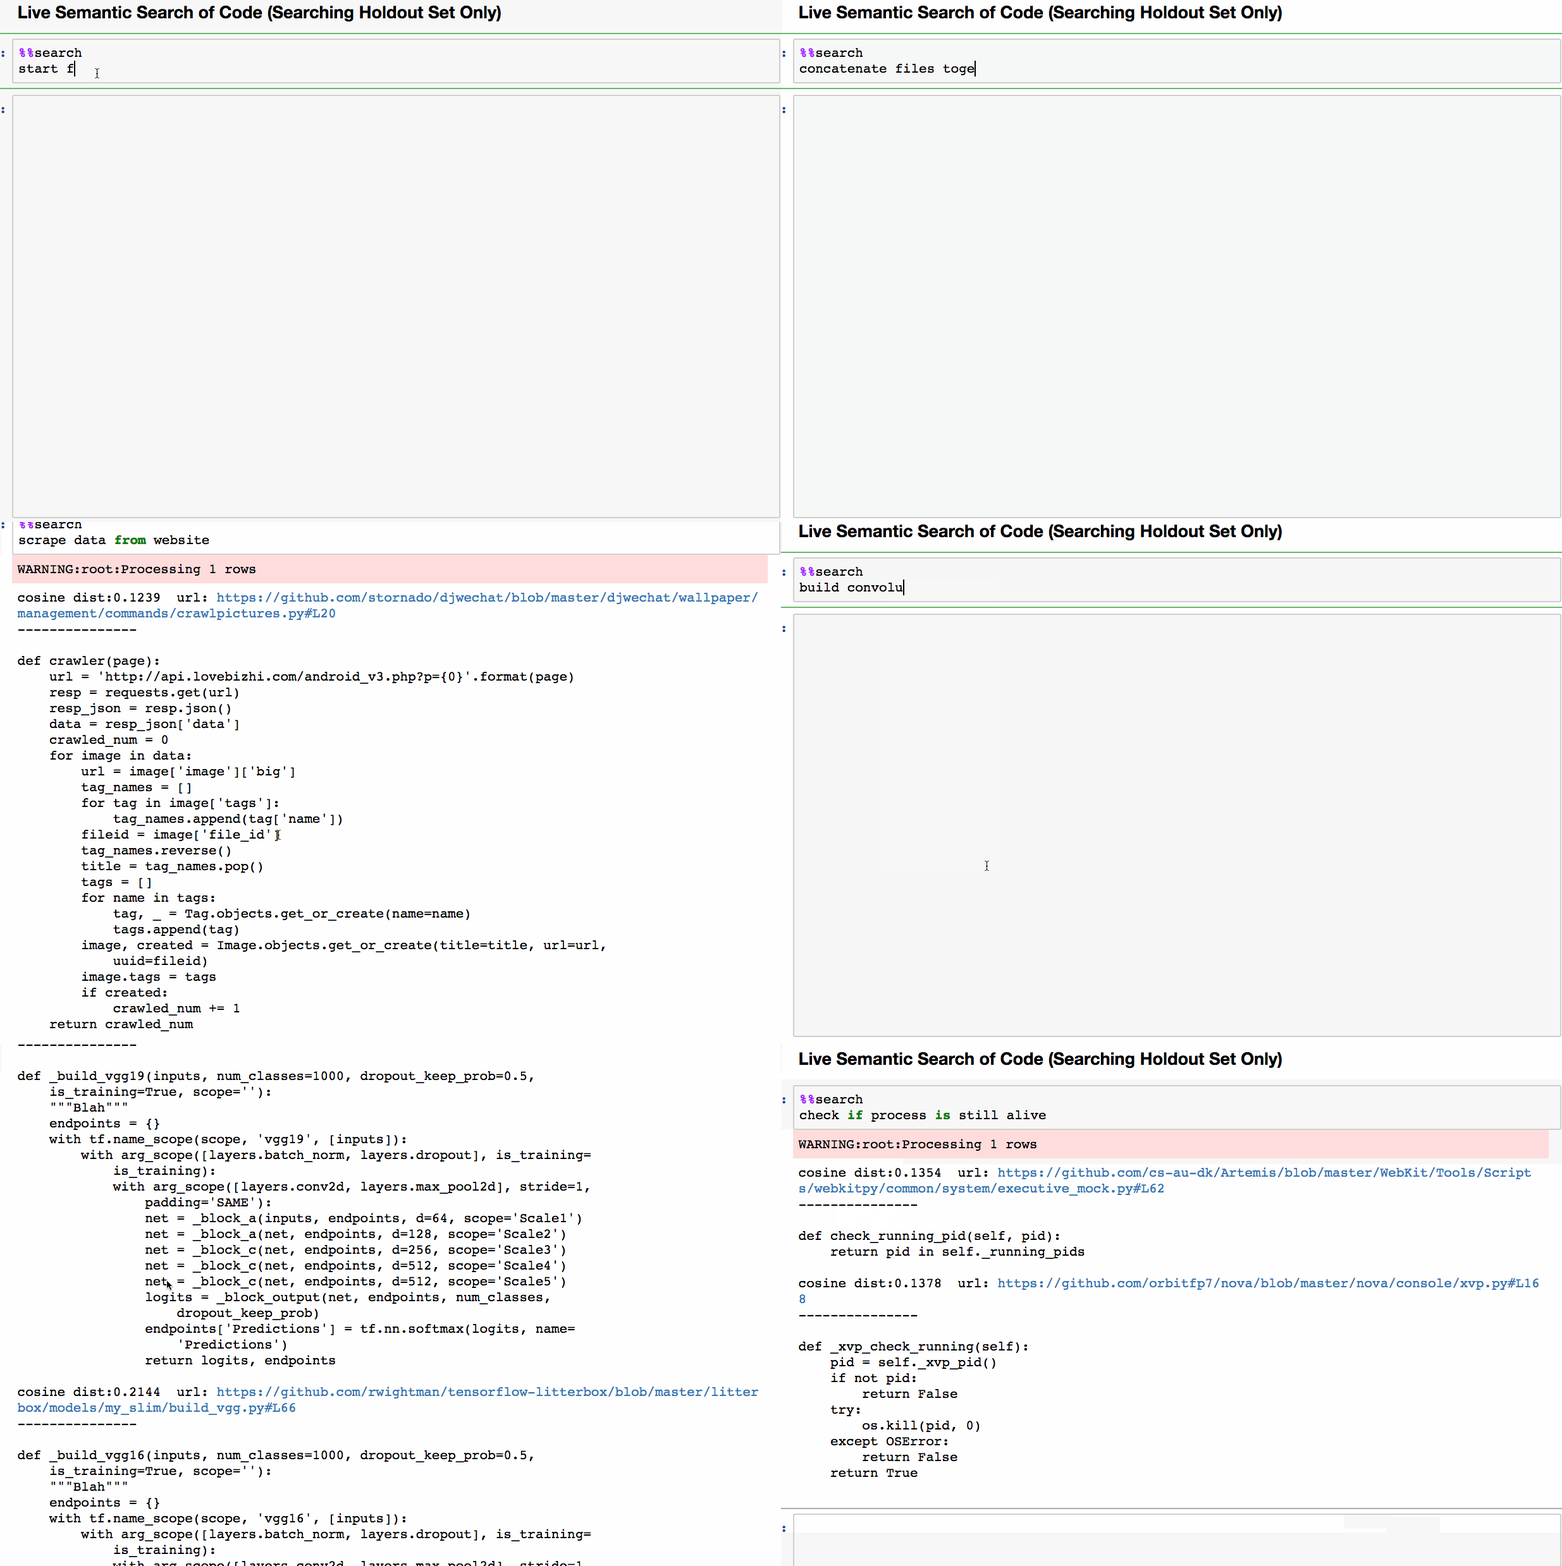
If this is not exciting enough, here is a live demonstration of what you will be able to build by the end of this tutorial:

Sometimes I use Jupyter notebooks and custom magic functions to create demonstrations when I cannot build a pretty website. it can be a quick way to interactively demonstrate your work!
Intuition : Construct a Shared Vector-Space
Before diving into the technical details, it is useful to provide you with a high-level intuition of how we will accomplish semantic search. The central idea is to represent both text and the object we want to search (code) in a shared vector space, as illustrated below:

Example: Text 2 and the code should be represented by similar vectors since they are directly related.
The goal is to map code into the vector space of natural language, such that (text, code) pairs that describe the same concept are close neighbors, whereas unrelated (text, code) pairs are further apart, measured by cosine similarity.
There are many ways to accomplish this goal, however, we will demonstrate the approach of taking a pre-trained model that extracts features from code and fine-tuning this model to project latent code features into a vector space of natural language. One warning: We use the term vector and embeddinginterchangeably throughout this tutorial.
Prerequisites
We recommend familiarity with the following items prior to reading this tutorial:
- Sequence-to-sequence models: It will be helpful to review the information presented in a previous tutorial.
- Peruse this paper at a high level and understand the intuition of the approach presented. We draw on similar concepts for what we present here.
Overview:
This tutorial will be broken into 5 concrete steps. These steps are illustrated below and will be a useful reference as you progress throughout the tutorial. After completing the tutorial, it will be useful to revisit this diagram to reinforce how all the steps fit together.

A mind map of this tutorial. Hi-res version available here.
Each step 1–5 corresponds to a Jupyter notebook here. We will explore each step in more detail below.
Part 1 — Acquire and Parse Data:
The folks at Google collect and store data from open-source GitHub repositories on BigQuery. This is a great open dataset for all kinds of interesting data-science projects, including this one! When you sign up for a Google Cloud account, they give you $300 which is more than enough to query the data for this exercise. Getting this data is super convenient, as you can use SQL queries to select what type of files you are looking for as well as other meta-data about repos such as commits, stars, etc.
The steps to acquire this data are outlined in this notebook. Luckily, some awesome people on the Kubeflow team at Google have gone through these steps and have graciously hosted the data for this exercise, which is also described in this notebook.
After collecting this data, we need to parse these files into (code, docstring) pairs. For this tutorial, one unit of code will be either a top-level function or a method. We want to gather these pairs as training data for a model that will summarize code (more on that later). We also want to strip the code of all comments and only retain the code. This might seem like a daunting task, however, there is an amazing library called ast in Python’s standard librarythat can be used to extract functions, methods and, docstrings. We can remove comments from code by converting code into an AST and then back from that representation to code, using the Astor package. Understanding of ASTs or how these tools work is not required for this tutorial, but are very interesting topics!
For more context of how this code is used, see this notebook.
To prepare this data for modeling, we separate the data into train, validation and test sets. We also maintain files (which we name “lineage”) to keep track of the original source of each (code, docstring) pair. Finally, we apply the same transforms to code that does not contain a docstring and save that separately, as we will want the ability to search this code as well!
Part 2 — Build a Code Summarizer Using a Seq2Seq Model:
Conceptually, building a sequence-to-sequence model to summarize code is identical to the GitHub issue summarizer we presented previously — instead of issue bodies we use python code, and instead of issue titles, we use docstrings.
However, unlike GitHub issue text, code is not natural language. To fully exploit the information within code, we could introduce domain-specific optimizations like tree-based LSTMs and syntax-aware tokenization. For this tutorial, we are going to keep things simple and treat code like natural language (and still get reasonable results).
Building a function summarizer is a very cool project on its own, but we aren’t going to spend too much time focusing on this (but we encourage you to do so!). The entire end-to-end training procedure for this model is described in this notebook. We do not discuss the pre-processing or architecture for this model as it is identical to the issue summarizer.
Our motivation for training this model is not to use it for the task of summarizing code, but rather as a general purpose feature extractor for code. Technically speaking, this step is optional as we are only going through these steps to initialize the model weights for a related downstream task. In a later step, we will extract the encoder from this model and fine tune it for another task. Below is a screenshot of some example outputs of this model:

Sample results from function summarizer on a test set. See notebook here.
We can see that while the results aren’t perfect, there is strong evidence that the model has learned to extract some semantic meaning from code, which is our main goal for this task. We can evaluate these models quantitatively using the BLEU metric, which is also discussed in this notebook.
It should be noted that training a seq2seq model to summarize code is not the only technique you can use to build a feature extractor for code. For example, you could also train a GAN and use the discriminator as a feature extractor. However, these other approaches are outside the scope of this tutorial.
